Home » 2023
Yearly Archives: 2023
The Dangers of Asbestos Remover
Asbestos is a natural mineral fiber with great heat and fire resistance. Its fiber strength also makes it a popular choice in construction materials, including roofing shingles, paper products, and asbestos cement products.
Professionals will first seal off contaminated areas with polyethylene sheets and duct tape during asbestos removal. They’ll also shut off HVAC systems to prevent dirty air from circulating throughout the building. Click https://www.perthasbestosremovalwa.com.au/ to learn more.

Asbestos was used in a variety of building materials until it was discovered to be an extremely dangerous cause of lung cancer and other serious illnesses. It is still found in many old buildings, and even new construction may contain asbestos. If not properly removed, this toxic mineral can pose health risks for your employees and clients.
A professional asbestos abatement team has the proper equipment and training to safely remove asbestos. They will use a range of tools to break up and remove asbestos material. They will also wet the material to prevent it from spreading dust into the air. They will then place it in a container that is leak-proof and sealed. They will also wear personal safety protection, including protective clothing, masks, and respirators.
The next step is to remove the asbestos waste and transport it to a certified landfill. The professionals will follow strict storage and disposal guidelines to ensure that the material doesn’t spread or contaminate other parts of your building. In addition, they will seal off the work area with plastic sheeting and negative air pressure units. They will also post warning signs to alert others that an asbestos removal project is underway.
Asbestos waste can be processed in a variety of ways, but the most established method involves heating the material to break it down into nonhazardous inert minerals. These minerals can then be recycled into ceramic and stoneware products and as aggregate for roadways and concrete.
If asbestos is disturbed, it can release tiny fibers into the air. These can be inhaled and lodged in the lungs, causing mesothelioma, lung cancer and other diseases. It is therefore important to use safety measures during any building repairs, renovations or demolitions that may disturb asbestos-containing materials. These include proper handling, minimizing the spread of dust particles, and establishing a decontamination area for employees.
Workers should wear respirators and other protective equipment while working with asbestos. These should be cleaned, disinfected, and inspected on a regular basis. They should also be disposed of immediately after use. It is also advisable to use disposable gloves and wash hands after work. Workers should also be sure to seal off the work area from other parts of the house and turn off heating and cooling systems. This will minimize the risk of spreading asbestos throughout the home and exposing other family members.
It is also advisable to keep pets and children out of the work area. They can easily track in asbestos particles and may bring them back into the home. It is also important to have the work area covered with plastic sheeting and duct tape and to block off access to it.
The risk of exposure to asbestos can be reduced by using wet methods. These include spraying the material with water or sanding it. The use of power tools with special local ventilation attachments can also reduce the exposure to airborne particles. However, some maintenance activities still pose a risk of exposure, such as sanding or drilling friable ACM.
These types of repairs should be done by professionals who have been trained in asbestos handling. Other maintenance activities that are not considered to be major repairs should be avoided, such as repairing or painting old asbestos insulation, sanding vinyl floor tiles or cutting, tearing or sanding the backing of ACM.
In addition, it is important to take precautions when sampling for asbestos. It is best to wet the sampled material with a fine mist of water containing a few drops of detergent before taking the sample. This will help to reduce the release of fibers during the sampling process.
Asbestos is a naturally occurring mineral that has been used in thousands of products. It is very strong and heat resistant, making it a useful material in a wide range of industrial and commercial products. However, it is also known to cause several health problems including mesothelioma and lung cancer. Asbestos environmental pollution is a serious issue, and it can be caused by a variety of different activities. These include buildings that contain asbestos, renovations and demolition work, and mining activities. These activities can release airborne asbestos fibres, which are then carried by wind and moved around the globe by global weather systems.
The most common source of asbestos contamination is from the application, disturbance and removal of asbestos-containing materials (ACM). ACM can be found in various building products such as floor tiles, roof shingles, exterior siding, cement, laboratory equipment, and automotive brakes. When ACM becomes damaged, microscopic asbestos fibres may become airborne and inhaled by individuals entering the area. Asbestos fibres can also be released from surfacing ACM, which is sprayed, troweled-on or otherwise applied to surfaces for acoustical, fireproofing or other purposes, and thermal system insulation ACM, which is rolled, spray foamed, sprayed-on or otherwise applied to pipes, boilers, ducts, tanks, and other structural components to prevent heat loss or gain.
Once asbestos is airborne, it can be easily inhaled into the lungs and cause serious health problems. If it is inhaled on a regular basis, it can lead to lung diseases such as mesothelioma and asbestosis. These diseases can be fatal if not diagnosed and treated in time.
During an asbestos abatement project, professionals will take many steps to minimize the risk of exposure. They will start by shutting off the HVAC system and blocking off any areas that don’t need work with tarps and heavy-duty adhesives. They will then put a filtration unit in place to create a negative pressure environment in the contained work zone. This will ensure that any air that enters the filtration unit is not recirculated into the non-abatement area.
When the workers are finished, they will carefully decontaminate themselves before leaving the work zone. They will wear disposable suits, hoods, gloves and shoe covers. They will also have a clean-up/decontamination station that is separate from the work zone. Finally, they will perform a final inspection to make sure that the work area is safe and that no asbestos has leaked outside the containment area.
The cost of asbestos remoer varies depending on the type and size of material being removed. The more friable the asbestos, the more expensive it will be to remove. However, even non-friable asbestos poses a risk and should be handled by professionals. The EPA recommends having all asbestos materials removed before attempting any renovation work in order to prevent future health risks.
The first step in removing asbestos is to prep the area. This involves removing personal items, toys, and tools from the area where the asbestos removal will take place. It also requires that the contaminated area be sealed off to keep it from spreading. A two-person crew can expect to spend up to eight hours on pre-clean and set-up.
Once the prep is complete, the actual abatement process begins. The workers wear protective suits and respirators to avoid inhaling any of the asbestos particles. They may also wear a plastic face mask to protect their skin. They will wet the asbestos-containing material before tearing it away. This is a crucial step because it helps to contain the toxic particles. The contaminated debris is placed into durable, airtight waste bags and containers for disposal. This material is then transported to a landfill that is equipped to handle asbestos.
Some of the most common areas for asbestos to be found are in ceiling tiles, vinyl floor coverings, insulation, and ductwork. Inhaling these substances can lead to a variety of illnesses including mesothelioma, lung cancer, and other serious diseases. Asbestos is a combination of six minerals that offer fire resistance and heat insulation, which made it very popular for building materials.
The most common types of asbestos found in homes are chrysotile and crocidolite. Chrysotile, which is white asbestos, is most often used in walls, ducts, and ceilings. It has very thin fibers and is more easily inhaled into the lungs. Crocidolite, which is blue asbestos, is more commonly found in cement products and pipe insulation. Its thinner fibers cause a more severe reaction and is more costly to remove than chrysotile asbestos.
How to Choose the Best Replacement Windows for Your Home
Replacement windows offer several benefits to homeowners, including increased natural light, updated curb appeal, and improved energy efficiency. New windows can also increase resale value.

Energy-efficient windows will help reduce drafts and put less strain on your HVAC system. Additionally, they will help keep outside noise out and your home’s occupants more comfortable. Visit https://yourhomeexteriors.com/ to learn more.
Choosing the best replacement windows for your home will not only improve your quality of life but may also provide you with an attractive return on investment. Whether you’re looking to add curb appeal, lower energy costs or increase home security, there are many options available to meet your needs.
When selecting the materials for your new replacement windows, be sure to consider their durability, aesthetics and cost. Vinyl, wood and fiberglass are some of the most popular choices for homeowners. While wood is more expensive, it offers a classic, timeless look and is extremely durable. Vinyl windows are more affordable, energy efficient and easy to maintain.
Consumer Reports recommends that you choose Energy Star-certified windows, which have been tested and recommended by the Environmental Protection Agency and can often qualify you for rebates or tax credits. However, it’s important to remember that not all Energy Star-certified products are created equal and you should always compare a variety of manufacturers’ windows to find the best one for your needs and budget.
Another factor that can affect the cost of replacement windows is the type of installation. Full frame replacement windows require the removal of the existing window trim and sill, and are more expensive than insert windows.
If you’re unsure which type of replacement windows to choose, ask a professional for help. They can examine your existing windows, make recommendations and assist you in finding the right fit for your home.
If your old window frames appear warped or damaged, they might need to be replaced entirely instead of simply replacing the window panes. If the frames are out of square, this could cause problems with locking and components that work properly. In this case, it’s best to use full-frame replacement windows.
When shopping for replacement windows, keep in mind that volume discounts are often available. Additionally, installing multiple replacement windows at once can reduce installation and haul-away costs.
The supply-chain issues that have affected many companies across the country have also impacted window production and delivery schedules, and it’s important to factor this into your project timeline. It’s recommended that you allow 2 to 3 months from the time your contract is signed until your replacement windows are installed.
Energy Efficiency
New replacement windows are not only an investment in a home’s appearance, they can also increase its energy efficiency and offer savings on utility bills. However, the exact amount of money saved depends on several factors, including the type of window chosen and the local climate. For example, replacing single-pane windows with Energy Star double-pane windows can save homeowners on average $101-$583 per year in energy costs.
Other variables include the quality of the caulking used, the insulation level, and other features that affect the window’s overall energy-efficiency rating. Using a window energy performance calculator or consulting with a window expert can help homeowners estimate the potential energy savings of their new windows based on their specific climate and current energy costs.
The final variable to consider is whether or not any available rebates or credits can be applied to the cost of replacement windows. Many local utilities offer a window energy-efficiency rebate of up to $200 per window, and some state governments also have energy-efficient incentives for homeowners. When calculating your window ROI, be sure to factor these potential savings into your total project budget.
If you’re interested in improving your home’s energy efficiency with replacement windows, be sure to speak with a local contractor to ensure the best results. A licensed and experienced contractor will be able to provide you with high-quality windows at a competitive price, as well as handle any installation issues that may arise during the process.
Additionally, a contractor will have access to better prices on windows because they buy them wholesale instead of retail. As a result, they can often pass the savings on to their customers by offering lower pricing than what is typically found at big box retailers.
In addition to the benefits of installing energy-efficient windows, you’ll also enjoy a more comfortable home and improved curb appeal. In fact, new windows can add up to 85% of your home’s value, so they’re an excellent way to boost your property’s value and enjoy a healthy return on investment.
Maintenance
Window replacement has become one of the most popular home improvement projects for good reason. It not only increases your property value, but also makes your home more comfortable and energy efficient. Modern replacement windows are designed with advanced insulation technologies that help regulate indoor temperature, reduce drafts and save you money on heating and cooling costs.
It is important to perform regular maintenance on your replacement windows to keep them in good condition. To start, you should remove any dirt and debris from the frame, sills and tracks of your replacement windows. This can be done with a clean cloth or soft-bristled brush. Make sure to wear rubber gloves when cleaning. You should also check and replace any caulking that is cracked or damaged.
Another important thing to do is to inspect your window for any signs of rot. If the frame is soft to the touch or has a musty odor, it is time to call one of our experts right away. A professional will repair the frame and re-caulk it, preventing moisture from damaging your window.
You should also perform routine maintenance on your window sashes and panes. This includes removing dust and cobwebs from the window frames and sills, and cleaning off the tracks and windowsills. It is also a good idea to clean the glass of your replacement windows to prevent water spots and fogging.
If you have multi-pane windows, you should also check the muntins and mullions to see if they need to be repaired or replaced. These are pieces of wood that sit in between the glass and usually make a cross-like pattern. If the muntins and mullions are damaged, you can repair them with new putty. If the muntins or mullions are split or rotting, you may need to replace them altogether.
If you want to increase the resale value of your house, you should consider replacing all of your windows at once instead of replacing just one or two. This will allow you to take advantage of energy efficiency improvements and cost savings from volume discounts. It will also give your house a more consistent look.
Style
New windows add value to your home and can improve comfort, energy efficiency, safety, and curb appeal. They also make it easier to clean exterior glazing without having to get on a ladder. But there are many different window styles and configurations to consider. Whether you want to replace single-pane, older windows or make a more dramatic style statement, there’s sure to be a window that meets your needs.
Some types of replacement windows are designed for existing frames, while others require that the frame be removed and replaced. The former are called insert windows and can be installed right into the existing frame with no need for a nail fin, brick mold or flush flange. They’re popular in homes that are built on a concrete foundation or those where the original frames are rotted.
Another type of replacement window is the double-hung or sliding window. It has two sashes that slide vertically and can open wide from either the top or bottom. They’re usually more energy efficient than single-hung windows, but they can cost a little more.
Casement and awning windows are hinged and turn outward from the left or right with an easy to use hand crank. They can be opened from the inside or outside and are great for hard to reach areas like above kitchen sinks and countertops. These are the most effective in providing ventilation and natural light for the home, but they can be difficult to install properly.
Other window styles include picture windows that do not open and close and transom windows high up on the wall to provide extra lighting or privacy in bathrooms. These can be custom made and can add a beautiful focal point to any room. They come in a variety of shapes and sizes, from massive picture windows in living rooms to smaller awning windows for the dining area. They can be combined with bay and bow windows to create a more unique look.
Yard Cleanup – What You Need To Know
Yard cleanup is the process of repairing, restoring, and maintaining your property’s lawn. It involves removing debris, weeds, and fallen leaves.
An unkempt yard attracts pests like snakes and spiders that can bite people or pets. A regularly scheduled, well-done yard can keep these creatures away. Click on https://www.perthrubbishremoval.com.au/ to learn how to increase the curb appeal of your home.

Remove Debris
Your yard is more than just a place where grass, flowers, trees, and shrubs grow; it’s an extension of your home and a canvas on which you can express your creativity. It’s also an investment in the health of your property and the environment, as a well-maintained yard supports local wildlife and helps preserve soil. As such, regular yard cleanup is vital to ensuring that your property is in prime (and enviable) condition.
Yard cleanup can be a messy job, so it’s important to come up with a clear cleaning strategy before you begin. This will help you prevent getting overwhelmed and will ensure that all the tasks on your checklist get done. Start by removing all visible debris like sticks, leaves, and twigs from your property. You’ll also want to trim any dead or overgrown tree branches before winter arrives.
As you remove debris from your property, make sure that you bag it up for trash collection. If you’re unsure how to dispose of certain types of waste, contact your local recycling center for guidance. Many waste disposal centers separate debris into different categories based on the type of material it’s made of, so it’s important to know what does and doesn’t count as yard debris before you throw it away.
If you have a lot of yard waste, consider starting a compost pile. This is a great way to reduce your waste and create nutrient-rich soil for your garden next year.
When you’re ready to get rid of the rest of your yard waste, you can haul it away with a junk removal service. These services are ideal for large pieces of debris like tree branches and stumps, as well as a variety of other items like plastic pans, old boxes, paper, and more. Most companies charge a flat fee based on the size of your property and the number of bags of debris that are hauled away.
As you complete your yard cleanup, remember to remove all of your gardening tools and store them away in a safe location. This will help you avoid injuries and ensure that your tools are ready to use when you need them again next spring.
Remove Silt
During flood events, silt (fine, muddy sediment) can build up in lawns and restrict grass roots’ access to air, sunlight, and nutrients. Once floodwaters recede, use a broom or rake to remove the silt. Then wash the area with a hose-end sprayer to be sure you get all of it. This prevents the silt from clogging up your gutter system or sitting on top of your roof, where it may cause a leak.
Afterward, rinse off your plants and garden beds with a hose. Doing so prevents the onset of mold and disease in damp, overwintering soil. It’s also a good time to hose off hardscape features like sidewalks, patios, and decks. A landscape contractor recommends hosing off retaining walls and fences, too, especially if they have been in contact with standing water for a long period.
While you’re cleaning up, take the opportunity to look for dead limbs or branches on your trees. These drooping limbs could fall on your home in a storm or become tripping hazards when someone walks through your yard.
If you’re planning on doing any spring gardening, make sure the weather is warm enough. Many types of bees hibernate in plant stems and leaves over the winter and won’t emerge until the weather warms up. In addition, it’s a good idea to wait until the ground dries up a bit before starting any intense spring yard work.
This prevents your flowers, vegetable gardens, and shrubbery from getting overgrown before the growing season arrives. And when the warmer months come around, you’ll be ready to tackle aeration, seeding and fertilizing, and of course, mowing the lawn! With some preventative yard cleanup, you can transform your outdoor space from a mess into a lush oasis. It just takes a little planning and effort to revive your yard, trees, bushes, and garden space. And with these 10 simple yard clean-up tips, you’ll be well on your way!
Remove Weeds
Weeds take up valuable space in your garden and lawn, crowding out desirable plants. They also steal moisture and sunlight from your grass, which is why removing them as soon as they appear is critical.
Pulling weeds by hand is the best way to get rid of them because it eliminates the entire plant (roots and seeds included) and prevents it from growing back. Try setting aside an hour or two each week to weed your yard or vegetable garden.
If you’re struggling with a particularly difficult weed, use tools such as garden claws, a dandelion digger, or a hand weeder—a long, slender tool that looks like a screwdriver with a forked tip. If you’re having trouble getting to the root of the weed, try loosening the soil around it with a rake or hoe before pulling. A weeding mat is another handy tool that’s ideal for large areas of the garden, as it allows you to pull out weeds without damaging the soil underneath.
You can also kill weeds using a spray, which is a safer option than chemical herbicides. However, you should be sure to choose a product that’s appropriate for your weed type. For example, broadleaf weeds like quack grass require a different treatment than annual weeds.
Before you start spraying, wait until temperatures have risen above 50 degrees Fahrenheit for seven days. Many types of bees and other pollinators hibernate in weed stems and leaves over winter and won’t come out until the weather is warmer.
In addition to weeds, keep an eye out for oxalis, which resembles clover with heart-shaped leaves and yellow flowers. This weed forms upright seed pods that explode when ripe and can quickly re-grow in lawns, planting beds, or gravel driveways. You can rid your yard of oxalis by fostering thick, healthy grass or using an organic weed killer.
In the future, prevent weeds from forming by laying down a 3-inch layer of mulch. Straw, bark chips, and wood-based mulches all block out sunlight that would otherwise encourage weed growth. Alternatively, you can purchase a landscape fabric that’s specifically designed to stop weeds from germinating.
Clean Up Your Vegetable Garden
Getting your vegetable garden ready for the season requires removing any overgrown weeds, preparing soil with organic matter, and making sure the beds are clean and free of debris. Ideally, this should be done before you plant anything in your garden. If you wait too long, you will find yourself dealing with more weeds and other invasive plants once the weather warms up.
Vegetable garden debris can harbor disease and fungus spores that will spread to new plantings and cause problems down the road. It can also smother seedlings and prevent them from growing as they should.
It is important to remove all rotting fruit, vegetables and leaves from your vegetable garden before starting to clean up for spring. It is a good idea to compost these materials rather than simply throwing them away, as this will help nurture your soil for next year’s vegetable garden.
While cleaning up your garden is a necessary task, it can be quite overwhelming. Before you begin, we recommend wearing a pair of work gloves and taking your time. You can also get the whole family involved in this chore to turn it into a fun, educational, and rewarding activity that will make your yard look better, as well as teach your children responsibility.
A Few Final Things To Remember When Completing Your Yard Cleanup:
Do not start removing leaf litter in your flower or vegetable garden until the temperatures have consistently been above 50 degrees Fahrenheit for seven straight days. Many types of bees and other pollinators hibernate in the leaves and stems over winter, and they will not emerge until it is warmer.
There is so much beauty in a winter garden—snow resting on the seed pods of spent sunflowers, berries clinging to bare branches, goldfinches flitting around tattered goldenrod fronds, and juncos hopping beneath fallen carrot tops. The last thing you want to do is mess up this winter scenery by tearing down skeletal plants. Instead, enjoy this season in your garden and watch it come alive again next spring.
When to Call a Plumber for Water Heater Repair
Water heaters heat and store incoming cold water for dishwashers, clothes washers, showers, and tubs. When a problem occurs with your water heater, you will want to hire a professional plumber visit Water Heater Repair Spring TX to proceed.
First, ensure electricity gets to the appliance by checking that the circuit breaker or fuse is not tripped.

If your water heater needs to provide more hot water for everyone in your house, several issues may be at play. The first thing you should do is check the thermostat to make sure it isn’t set too low. It would help to keep it between 120 and 140 degrees Fahrenheit to save energy. The thermostat can be adjusted by turning the dial on the side of your water heater.
If you turn the temperature dial up and still don’t have enough hot water, your water heater is undersized for your home. Replacing it with a larger unit may be the best course of action.
Another issue could be that the heating elements have gone bad and must be fixed. This is most likely to happen with electric units but can also occur with gas units if the thermocouple or thermopile is defective. If this is the case, replacing them will solve your problem.
A faulty in-line or ball valve is another common cause of not having enough hot water. This is usually a simple fix and can be done by a plumber. If the water tank leaks, it can often be fixed by draining and flushing the unit. This is typically a job for a plumber, as it requires shutting off breakers and draining the unit, but they can do this quickly and at a reasonable cost.
Some leaks can be fixed by simply tightening the nut on the pressure relief valve. If this isn’t the case, it will require removing the unit and replacing the valve.
If you notice any water leaking around your water heater, you should turn off the power and water supply, then immediately call a professional to take a look. Some problems, like tank leaks, are unfixable and need to be replaced, but the pros will help you understand your options and answer any questions you might have.
If the water coming from your faucets smells like rotten eggs or has a metallic odor, it’s important to find the source of this problem. If a gas leak causes the scent, contacting a professional to address this issue immediately is best. If the odor comes from your water heater, several things can be done to fix the problem.
The first step is to determine whether the odor and discoloration are present in hot and cold water or only in hot water. If they are only in hot water, the problem likely stems from your water heater, and you should flush the tank as your appliance manufacturer recommends. If they occur in hot and cold water, the problem may be caused by your well or plumbing system. This requires a thorough flushing of your entire water system by a licensed plumber.
If the odor is coming from your water tank, it’s often a sign of a magnesium anode rod that has become corroded. This rod is designed to absorb rust from the tank but can start to erode and produce hydrogen sulfide when exposed to water containing sulfites. Hydrogen sulfide can be dangerous at high levels and cause nausea, headaches, and delirium in humans. A plumber can replace your magnesium anode with an aluminum or aluminum/zinc anode to stop the odor and prevent damage to your water heater.
If the odor comes from your drain pipes, it’s usually a sign of bacteria in the pipes. These bacteria produce gases that smell like sewage when the drain is used. The bacteria are generally caused by your water heater running at a low temperature or sitting idle for an extended period. Disinfecting the drainpipes with a hydrogen peroxide solution will usually eliminate this odor. If the smell persists, a plumbing professional should assess your system and recommend a whole-house water treatment solution.
Most homeowners give more thought to their water heater when it starts acting up. When this important household appliance goes awry, it can create many problems that are difficult to ignore. Being unable to shower, wash dishes, or clean the laundry room is frustrating and inconvenient. Worse still, a leaking water heater can lead to significant home damage and high water bills. Call a plumber to schedule repairs immediately if you see signs of a leaking water heater.
Leaks from pipes, fixtures, and appliances are a common problem that can occur in any home. Worn-out or damaged pipe joints typically cause them, clogged or overflowing pipes, and pipe corrosion. These problems can be easily prevented with routine plumbing maintenance. In addition, homeowners can reduce the risk of leaks by regularly checking behind appliances and cabinet corners for rust or discoloration.
Water stains on the walls and ceilings and higher than-usual water bills are all signs that you have a leaking water heater. If you are experiencing one or more of these symptoms, you should shut off the water in your house and turn off any hot-water-using appliances. If there is a lot of water flow, you should also place a bucket under the leak to prevent flooding.
If you notice that the water from your tank has a strong sulfur smell or is discolored, it may be a sign of corroded metal parts or sediment buildup in the tank. In some cases, this can be repaired by flushing the tank and having a plumber replace the magnesium or aluminum anode rod.
You can prevent some water heater leaks by draining the tank about twice a year. This will keep sediment from building up and rusting the tank. It is best to drain the water heater with a hose connected to the temperature pressure relief valve at the top and the drain valve at the bottom of the unit.
It would help if you also had a plumber inspect and replace the float and the refill and venting valves at least once every five years. These valves can wear out, causing the water heater to overheat and leak.
When water heaters start to make noises, it’s a sign that something is wrong and you should take action. While homeowners can address some noises, others will require the help of a professional plumber.
Screeching sounds are typically caused by a partially closed valve that traps water and creates a high-pressure environment. This will cause the water to try to escape through the trapped water, resulting in the screeching sound you hear.
Tapping noises indicate that your check valves need to be adjusted or replaced, or you might have sediment buildup in the tank. In either case, you’ll want to have a professional inspect your water heater and check all valves to ensure they can open and close properly.
A squeaking sound is usually confined to one fixture or area of plumbing and can often be traced back to a worn washer, grimy aerator, loose brass screw, or other small component that needs to be replaced. In most cases, a quick repair by a professional should resolve the issue.
Loud banging or rattling noises can indicate that your pipes are expanding or contracting as they heat up and cool down. This can be a problem for copper pipes that need to be insulated because they will enlarge and then shrink to scrape against house joists, studs, and wall supports. In some instances, turning down the temperature of your water heater may help resolve the issue without requiring any invasive pipe work.
Knocking or hammering noises can occur when water crashing into shutoff valves too quickly causes a shockwave that hits the pipes and makes them vibrate and make noise. This is a small deal, but it can be unpleasant if the sound disappears. Installing air chambers or water hammer arrestors can help to eliminate these sounds.
Singing or sizzling sounds can signify that your water heater is nearing the end of its life and will soon need to be replaced. If this is the case, you’ll likely need to drain and flush your tank to remove any accumulated sediment in the bottom of it. Performing these routine maintenance tasks will extend the life of your water heater and save you money in the long run.
Hydro Jetting Removes Sewer Line Blockages and Clogs

Fats, oils, and grease (FOG) are the number one cause of sewer line blockages and clogs. While snaking can break up some of this buildup, Hydro Jetting Los Angeles can remove it entirely from your pipes.
Avoid recurrent clogs and prevent costly repairs with a hydro jetting service from your local plumber. Learn about the many benefits of this drain-cleaning method.
All buildings experience slow or clogged drains and sewer lines at one point or another. Materials like minerals, grease, sludge and debris build up in your pipes over time causing sluggish drainage and backups. If you’ve tried using a snake to remove the buildup and found that it doesn’t get rid of all of the gunk, hydro jetting may be your best option.
This non-invasive technique is a green technology that uses only pressurized water to clean your pipes. While no drain cleaning method can be considered 100% environmentally friendly, it’s a great improvement over other techniques that use harmful chemicals and can damage your pipes. Hydro jetting doesn’t just unclog your drains and sewer lines, it cleans them and restores them to pristine condition, preventing future clogs and saving you money in the long run.
Hydro jetting is also an effective way to clear out invasive tree roots that have infiltrated your sewer lines. The force of the high-pressure water jet blasts away the tree roots without damaging the pipe itself, which can save you money on future repairs and replacement costs.
The hydro jetting process is also a good option for older plumbing systems. It’s important to have a professional plumber perform a camera inspection before you decide to have your sewer line hydro jeted, as it can be risky for older pipes that are fragile and more likely to break under the pressure of the water jet. If you’re concerned about the age of your pipes, a professional plumber will be able to recommend other solutions that might be safer and more effective for you.
While hydro jetting is an environmentally friendly solution, it can be expensive and requires specialized equipment. It’s a good idea to have this service performed every 1-2 years as part of a preventative maintenance plan, but your plumber will be able to tell you exactly how often your pipes need to be cleaned based on the results of your video inspection.
Effective
Hydro jetting is one of the safest and most effective methods of cleaning pipes and removing blockages. Unlike mechanical drain cleaners that can damage your pipes, hydro jetting reaches into hard-to-reach areas of your plumbing and sewer system, blasting away stubborn clogs and buildup. It also leaves your pipes clean, reducing the chance of future blockages and clogs.
Hydro jetting removes grease, hair accumulation, sludge, debris, dirt, scale, roots, and other obstructions. It is the best option for resolving recurring clogs in commercial and residential plumbing systems and sewer lines. Using highly pressurized water, the jets scour your pipes clean while dislodging the blockage. The debris is then flushed away by gravity and your plumbing system’s normal flow of waste. The jets of water also eliminate bacteria and other health hazards that can develop on the walls of your plumbing and sewer pipes.
Using a video inspection, your plumber will access the pipes that need to be cleaned with a specialized nozzle. This nozzle connects to a hose that can withstand high psi forces and is connected to your plumbing system’s water tank. The plumber will use the nozzle to target the clog or blockage area, spraying water in multiple directions, cleaning the entire pipe length. The nozzle also features an attachment for vacuuming up the removed debris, making it possible to quickly and thoroughly clear even the largest of blockages.
While hydro jetting is a great choice for many clogs, it is not suitable for all situations. If your clog is caused by a collapsed pipe, or by tree roots that have penetrated your plumbing system, hydro jetting could damage your pipes. If this is the case, your plumber will suggest another solution.
In addition, if your pipes are old or in poor condition, the amount of pressure used with hydro jetting may cause damage. However, if your pipes are newer and in good condition, hydro jetting is an excellent option for keeping them clean and free of clogs and blockages. If you’re ready to give hydro jetting a try, contact HB Home Service Team today. We include a free camera inspection and 90-day warranty with every hydro jetting appointment.
Non-Invasive
Hydro jetting blasts away clogs by shooting a stream of water with high pressure. The front nozzle aims forward while the side nozzles flush backward to shift debris out of the way. This level of force can easily remove grease and soap scum that mechanical drain cleaners cannot. It is also ideal for tackling tree roots that have infiltrated sewer lines. The high water pressure can dislodge and blast away whatever is causing the blockage, including sludge that is hard to break apart.
Other traditional unclogging methods such as drain snakes may punch a hole through the blockage, but they are not thorough enough to clean the entire pipe. This means that a new clog is likely to form sooner or later. Hydro jetting is one of the few techniques that can completely eliminate the root cause of the clog and prevent future issues.
The plumber will insert a hose at the cleanout and direct the powerful water flow to the clogged area. This process does not require invasive plumbing work, so you will not have to deal with messy and loud equipment and construction noises. The nozzle is easily inserted through the cleanout, and it can reach hard-to-reach places that would be difficult to access with other methods.
In order to determine the severity of the clog and its location, the plumber will use a video inspection tool before proceeding with the hydro jetting. This will help them to identify any damaged or corroded pipes so they can take the necessary steps to repair and replace them. The specialized water pressure will also be less damaging to the pipes than other types of chemicals and solvents that can be used in the plumbing industry.
Unlike other drain cleaning methods, the water used for hydro jetting is just pure, pressurized water. This is an environmentally friendly method that does not introduce harmful chemicals or silica sand into the soil and groundwater. This is the perfect option for homeowners who want to reduce their environmental impact while still having a healthy, functional plumbing system.
Saves You Money
A major clog in the sewer line can cost you money and disrupt your home. Often, these problems can be prevented with preventative maintenance and addressing clogs as soon as they appear. But sometimes, you may experience a blockage so severe that plungers and drain snakes are ineffective.
In this case, hydro jetting can save you time and money. It uses high-pressure streams of water to blast away debris and clean the insides of pipes. This is a very efficient way to deal with large buildups and eliminate bad odors caused by bacteria in the sewer system. In addition, it can reach clogs that are located underground, saving you the time and expense of digging up your yard to get to them.
It is also effective in cleaning up the aftermath of a sewer backup. While other plumbing methods may be able to dislodge some of the debris, it is very difficult to completely remove all the sludge and waste from your pipes. Hydro jetting is the most effective way to do this without causing damage and without having to dig up your entire yard.
The power of the water stream can even dislodge tree roots that have infiltrated your sewer line. This is especially useful in older homes where the piping has not been updated. The powerful water jets can cut through the roots and clear the entire pipe, saving you from costly repairs.
Hydro jetting has been around for more than eighty years, but it wasn’t until recently that the technology became more affordable for residential homeowners. Today, the equipment is much smaller and more portable so that plumbers can use it at an affordable rate.
Hydro jetting is the fastest, most effective way to clear a clogged pipe and restore your home’s plumbing to its full functionality. It is also safe for your plumbing and the environment, making it a wise choice when you need to address serious drainage issues. By thoroughly cleaning your pipes, it is also a smart way to prevent future problems and save on expensive repair bills.
Why It’s Important to Get a Home Inspection
Home Inspector Colorado Springs CO is an important step in the home-buying process. It can reveal problems that would be costly to repair or ensure buyers understand a prospective home’s condition.
Homebuyers may feel nervous about the outcome of the inspection. Fortunately, there are ways to reduce their anxiety and prepare for the inspection.

Finding a reliable home inspector is in your best interests if you plan to buy a home. Choosing the right person can save you time, money, and trouble later.
Getting referrals from friends is a good place to start, but you should also look for online reviews. For example, sites such as Yelp and Angie’s List can better understand an inspector’s overall performance. You should also check whether the home inspector is licensed in your state and what professional associations they belong to. Membership in these organizations typically means the home inspector adheres to certain standards of practice and ethics.
Most real estate agents will recommend a few home inspection companies, but it’s important to do your research. While it may be tempting to go with the home inspector your agent recommends, you should remember that their fiduciary duty is to the seller and not to you. Plus, your agent may receive a referral fee from the home inspector they recommend, which can affect their objectivity.
It’s also a good idea to ask the home inspectors you are considering about their training and experience. If they have a lot of experience, they will likely be familiar with the type of house you are interested in purchasing. In addition, it’s a good idea to choose an inspector familiar with the local area, as they will be able to identify issues more easily.
Another thing to consider is the inspector’s level of professionalism and customer service. It’s a good idea to look for online reviews about the inspector and call past clients for testimonials. You can also check with your state’s governing body to see whether the inspector has any consumer complaints against them.
As you shop for an inspector, remember that you’ll likely need to schedule the home inspection quickly, as most contracts are contingent upon the inspection results. If an inspector is lined up, you can avoid losing a property, especially in hot markets where homes are going fast.
When it comes time to sell your home, having a professional examine its condition can be beneficial. The inspection can identify problems you may want to address before putting the house on the market, helping you get it in top shape for the new owners. In addition, you may be able to negotiate with buyers based on the inspector’s findings.
However, an inspection can be stressful for homeowners, especially if the property is still occupied. There are a few things that you can do to prepare for the inspection and reduce some of the anxiety associated with it.
Make sure to clean and organize your home before the inspector arrives. A clean house is easier to inspect, allowing buyers to envision living in the space. It’s also a good idea to remove items from the attic, basement, and crawl spaces that aren’t being used. This will help the inspector do a more thorough job and prevent any issues with accessibility.
It’s also good to check your smoke and carbon monoxide detectors and replace batteries. Depending on where you live, you may be required to have a certain number and location of these devices. Finally, it would be best to clean and oil any mechanical components that need it, such as the furnace or air conditioning unit.
If you’ve recently completed any major remodeling projects, having the paperwork for the inspector to review is a good idea. This can prove that the work was done, reassuring buyers and speeding up the process.
You should also make sure to have any necessary documents from the septic system or if these are located on the property. These will be important for the new homeowner to have access to.
Finally, you should ensure that any animals are secure before the inspection. Most inspectors prefer that pets be taken off the premises during the inspection, but if this isn’t possible, you should ensure they are in a safe area of the house.
When you’re in the process of buying a home, it’s important to attend the home inspection. Inspectors typically encourage buyers to accompany them so you can ask questions and see the inspection in action. This will give you a better understanding of the property and its condition.
During the inspection, the inspector will take note of any issues with the electrical system, plumbing, and structural integrity. They will also check for safety features like ground fault circuit interrupters (GFIs) in bathrooms and kitchens.
They’ll also look in the attic, basement, and crawl space to ensure adequate insulation and ventilation. This is key to a safe, well-functioning, energy-efficient home that promotes healthy airflow throughout the house.
The inspector will also evaluate the condition of the roof and its flashing. They’ll check the shingles to ensure they are in good shape and there is no damage. The inspector will recommend a qualified roofing professional for repair or replacement if there is one.
A home inspector will also test the plumbing to see any leaks. They’ll flip the switches on all the outlets to see if they are working and will check for GFIs in bathrooms and kitchens. They’ll also look in the basement for signs of water damage.
If the inspector finds any issues, they’ll usually describe them in their report. This will include the problem, how urgent it is, and what you can do to fix it. In addition, the inspector will provide an estimated cost of repairs.
As a buyer, you’ll usually get your home inspection report within a few days of the inspection. Once you have it, review it with your agent and decide what issues you want the seller to address before closing.
If you want to get the report immediately, you can always offer a lower purchase price or request credit at closing for items that need fixing. However, this is rarely recommended as it can delay the sale and may require additional negotiations.
The home inspector will provide a detailed report of his findings as soon as the inspection is complete. This document typically includes photos and a summary of each item on the list of defects. In addition, it will describe the condition of the home’s structure and major systems, such as the roof, plumbing, electrical, and HVAC systems. The report will also include a recommendation section with suggestions for maintenance.
The inspection report can be an invaluable tool in a real estate transaction. If it reveals serious problems, a buyer may back out of the deal or request that the seller make repairs before closing. For this reason, many buyers include a home inspection contingency in their purchase contract.
Depending on the severity of the problems found, it may be helpful to have an attorney review the inspection report before finalizing the sales contract.
Before hiring a home inspector, look for one certified by a professional organization. The Better Business Bureau and local real estate associations can recommend inspectors. You should also check online for complaints against the inspector.
A few days after the inspection, the home inspector will send you a report listing all the items he has found. The report will likely be more detailed than a standard home inspection report, which can run dozens of pages. In the report, the items will be rated by their importance, with safety issues receiving the highest priority. The last page or two usually includes a summary of the findings.
The home inspector may offer recommendations for addressing each issue. For example, he may suggest replacing a worn-out air filter in the HVAC system or installing a smoke detector. However, he is not required to make these recommendations; the seller can accept or decline them.
Home buyers should be prepared for a long list of defects, even in newer homes. In addition, the home inspector may find issues that are not immediately apparent or cannot be easily corrected. For this reason, discussing the home inspection results with your real estate agent before making an offer on a home is important. The agent can help you prioritize the issues and determine how they might affect your decision to buy the property.
Ceiling Repair – How to Keep Your Ceilings in Good Condition
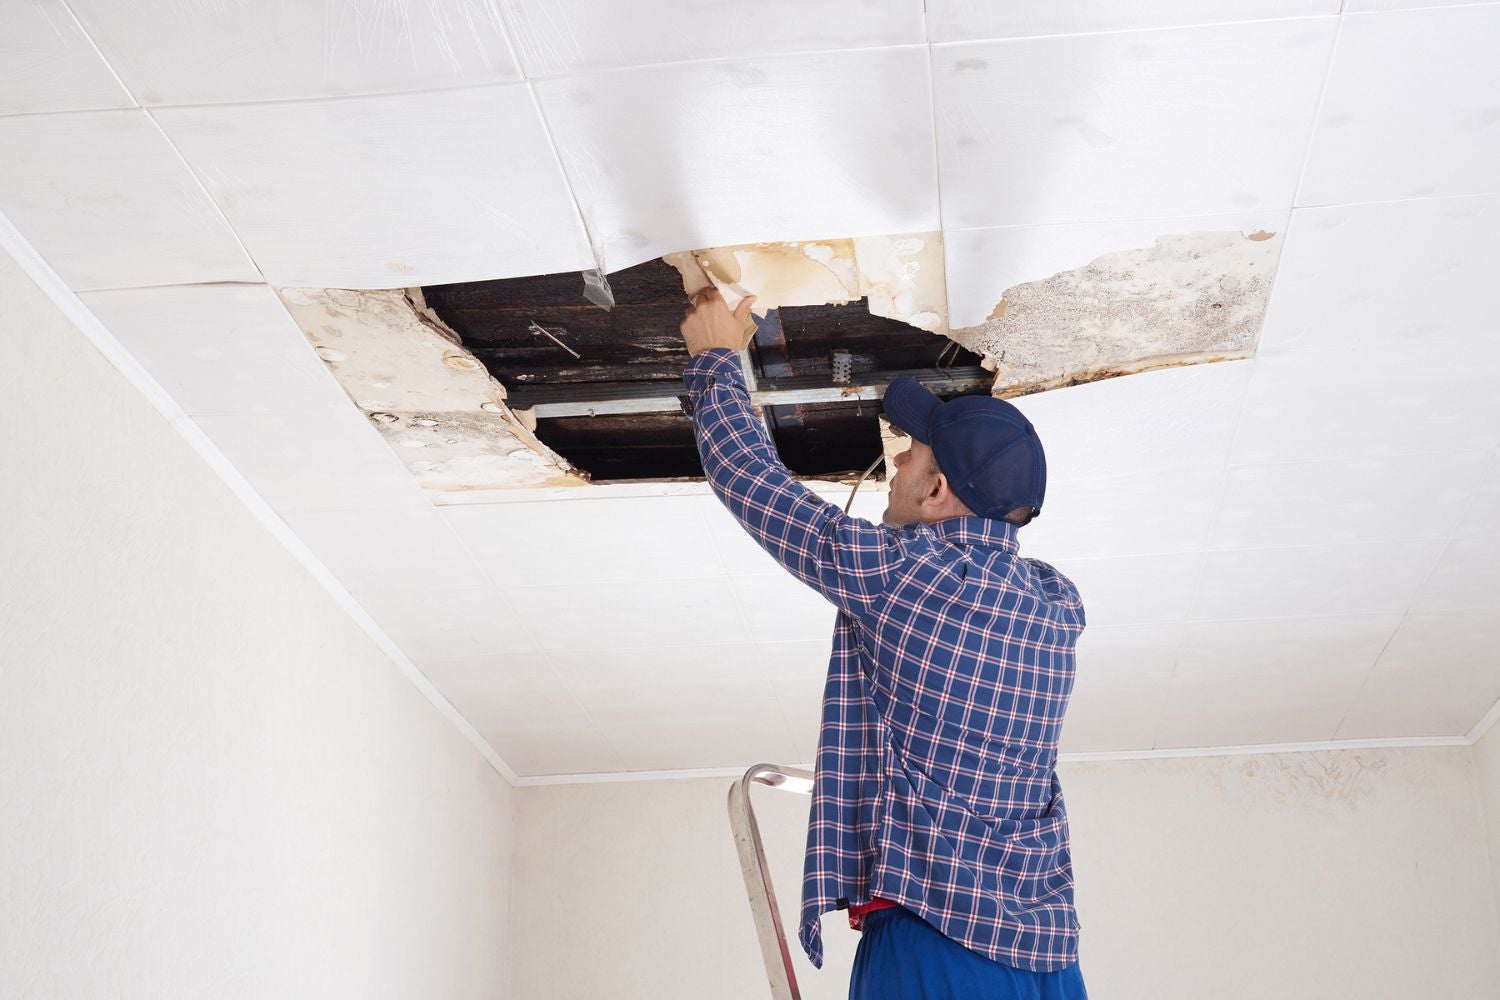
Keeping your ceilings in good condition will protect your home’s drywall and add value. Damaged and sagging ceilings can be costly, and water stains and mildew can cause health issues in some individuals. Plumbing leaks usually cause holes in the ceiling that must be fixed immediately before more extensive damage occurs. It’s also important to find the source of the leak and repair it properly. Check out this website at https://perthinsulationremover.com.au/ to learn more.
Drywall Repair
Drywall repair is the process of filling holes, cracks, or other imperfections in drywall. Small scratches and dents can be filled with a layer of spackle or drywall compound and then smoothed over, but larger holes require a patch kit and a new piece of drywall to repair. Larger holes may also need reinforcing mesh before spackling, but even that is often unnecessary, depending on the size and extent of the damage.
Dry wall is attached to wood studs, and changes in temperature or humidity can cause those studs to bend and create cracks in the drywall. Whether these cracks are small or large, it is important to repair them, as they can allow water to get in and cause further problems. A professional painter can easily repair these cracks and gaps, but you can also do it yourself if you follow these tips:
First, make sure that the area surrounding the hole is free of loose drywall and debris. Use a putty knife that’s 3- to 4- inches wide, instead of the narrow utility knives you might normally use for wood putty, to spread and smooth the drywall compound or spackle. Make sure to apply several thin layers, letting each one dry before applying the next. This will ensure a smooth, even repair. Finally, lightly sand the surface to smooth it and remove any bumps or ridges.
You can also use a patch kit for smaller holes. When using a patch, be sure that it’s the right size for the hole; if it is too big, it will cause additional damage when you try to screw it in place. Then, follow the instructions on the package to install the patch. It will typically include a piece of masonite or plywood to hold the patch in place, which is secured with strips of paper drywall tape.
If you have drywall anchors (like nails or screws) that are coming loose, you can usually fix them by cutting away the old piece of drywall and then nailing in a replacement. If you have major water damage, however, your contractor will need to take down the entire ceiling and may need to replace insulation as well.
Water Damage Repair
Water damage repair is a huge job that can cost thousands of dollars. First, there’s the cost of removing and replacing water-logged walls and ceilings. Then there’s the cost of dehumidification, repairing/replacing insulation and drywall, and other general repairs. The amount of water that needs to be removed and the extent of water damage determines the overall cost of water damage repair. If there’s a lot of standing water, it’s important to drain and pump out the water as quickly as possible to avoid serious structural damage and prevent mold growth. It’s also important to be safety conscious and turn off any electricity in the affected area, says Thumbtack home expert David Steckel.
Water damage can be caused by a wide range of things, from natural disasters and heavy rain to plumbing issues like leaks and burst pipes. It can cause everything from imperceptible staining to severe structural damage and potential health risks. When water damage occurs, it’s important to find out the source of the water so that the proper repairs can be made. It’s also important to remove all of the affected materials, including drywall down to the studs, carpeting and padding, and other flooring. This helps to speed up the drying process and ensures that the structure is completely dry before it’s closed up again.
Hole Repair
A hole in the wall is unsightly and can serve as a point of entry for pests and other undesirables. It can also cause damage to the drywall or plaster, which requires extensive work to repair. However, with a little effort and care, it’s possible to patch a hole and make it virtually undetectable.
The first step is to clean the area around the hole. This removes any dust and debris that could interfere with the repair process. It’s also a good opportunity to clean any loose drywall or plaster that may have come from the hole itself.
Next, if the hole is small enough it can be repaired with spackling paste and a putty knife. This will take less time and is a good choice for those who want to quickly repair a small hole, then paint over it as soon as possible.
Larger holes require a more involved method. It’s best to use a drywall patch that is slightly larger than the hole. This will allow you to “feather” the joint compound into the rest of the wall when applying it. This will make it easier to hide the patch, as well as give a more professional looking finish.
To prepare the hole for the patch, it’s necessary to cut a neat square or rectangle out of the remaining drywall around the hole. Then, using a level and a stud finder, locate the studs on either side of the hole and mark a line up above it straddling both studs. It’s important to do this to ensure the new drywall patch will be secured properly to the studs.
Once the patch is in place it’s time to apply joint compound. Be sure to use a good quality joint compound that is designed for drywall. It should be applied liberally and smoothed with a putty knife. Be sure to feather the compound into the rest of the wall when sanding.
This will help to ensure that the textured surface of the wall blends in with the smooth surface of the patch. It’s also a good idea to use a piece of drywall tape over the seams to further strengthen the repair.
Peeling Paint Repair
Paint peeling isn’t just unsightly; it can also lead to further problems, including water damage and mold. If you notice a section of your wall or ceiling that’s flaking, you need to fix it before you repaint the area. This might be as simple as scraping away loose or damaged paint and patching up any holes left behind by the peeled area. As with other drywall or plaster repair work, you’ll want to put on your goggles and dust mask before beginning this task. Paint and sandpaper don’t mix well!
First, use a wire brush or paint scraper ($13, The Home Depot) to remove any loose or chipping paint. You may need to apply a bit of pressure, but don’t overdo it; you don’t want to damage the surface underneath. Once the paint has been removed, patch any holes left behind and smooth the area with a putty knife. Professional painter Matthew Stone recommends using a spackling compound like DAP Drydex, as it’s designed to hold up well to moisture and won’t crack.
After sanding, wipe the space down with a damp sponge or tack cloth to ensure a clean wall surface and prevent it from becoming stained by any remaining mold, mildew or other contaminants. Once the area is completely clean and sanded down, you can apply a thin coat of primer. Then, let it dry according to the manufacturer’s instructions.
When the primer is dry, you’re ready to start painting! Once again, be sure to wear your dust mask and goggles so you don’t get any tiny flecks of paint in your eyes or on your skin. If you’re unsure of the proper way to finish painting your ceiling, contact a reputable local painter for assistance.
The main goal of this blog post is to show how easy it can be for homeowners to fix common issues that come up while they’re doing DIY projects in their homes. If you ever have any questions or concerns, please don’t hesitate to contact us. Our team at Tribble would love to help!
How to Transform a Living Room in a Few Hours
One of the quickest ways to transform a living room is by applying a fresh coat of paint. While painting can make a big impact, it also requires careful planning to avoid costly mistakes that can be difficult to undo.
Bunbury Painting Service has ways to work with living room painting. Including using colors to create a striped feature wall or subtly zone separate rooms within an open-plan space.

A new coat of paint is one of the most affordable ways to transform a living room. However, it takes time and effort, especially if the space is large or difficult to reach. Before you start painting:
- Gather all your supplies, including caulk, drop cloths, brushes, and a tape measure.
- Remove all wall hangings, curtains, switches, and outlet covers before beginning to prep the walls for paint.
- Caulk any cracks or holes, and wipe surfaces down to remove dust and dirt.
If you’re not up for a full-scale paint job, add stripes to your living room with a simple, classic look that requires little skill. Paint your stripes in a color that coordinates with your decor and complements your existing furniture. Keep the color scheme simple to create a clean, modern look, or go for a more dramatic effect by incorporating multiple shades of contrasting colors.
Horizontal stripes make walls appear taller, which is desirable in most living rooms. If you want a bolder look:
- Choose vertical stripes.
- When selecting the width of your stripe, remember that wider stripes are more noticeable and can overwhelm a smaller space.
- If you prefer a more subtle look, opt for narrower stripes.
It’s important to note the direction of your stripes before you begin to paint, as they can impact the space’s ambiance. For example, horizontal stripes evoke calmness and relaxation, while vertical ones convey a sense of strength and dignity.
Regarding the stripe’s width, remember that thinner stripes are easier to handle because you have less work to do with taping off and covering them up. Thicker stripes, however, look more elegant and can be a great focal point in a room.
You may also opt for horizontal and vertical stripes to achieve an eclectic and unique look. Regardless of how you paint your stripes, testing the colors on your walls before making any final decisions is important. Look at them in different lighting throughout the day and see how they appear next to other elements like curtains or furniture.
Consider painting a mural if you want to add a bold and eye-catching statement piece to your living room. Murals can be a great way to show off your personality and style without the expense of buying new furniture. However, painting a mural is not for the faint of heart and requires careful planning to ensure it turns out well.
Before you start, decide what type of mural you want to paint. Are you interested in something simple like a tree or flower, or would you prefer something more complicated, such as a cityscape or cartoon character? Once you have a clear idea of what you want, sketch a basic design to guide your work. This can be done on paper or by using a free design program. It is important to remember how the mural will look when crowded with furniture, bookshelves, and other design elements.
Once you’ve mapped out your design, it’s time to prep the wall for painting. Start by ensuring it is clean and free of dust and debris. You may need to do some light scrubbing or vacuuming if your walls are particularly dirty or greasy. Then, a layer of primer is applied to the entire surface. This will help the paint adhere and cover any imperfections in the wall. After priming, let the wall dry completely before moving on to the actual painting.
When choosing the right colors for your mural, select ones that coordinate well with the rest of the living room. For example, select green paints that complement the surrounding decor if you’re going for a tropical mural. Then, finish the space with accents in other tropical or ocean-inspired shades.
If you need help achieving the perfect lines for your mural, use painter’s tape and carefully measure to ensure you get crisp edges. This is especially important when working with a complex or intricate design. Finally, protect yourself during the painting process by wearing a respirator and working in a well-ventilated area.
The ceiling is the middle child of design canvases, often forgotten but with plenty of untapped potential to make a room stand out. It can be the perfect place to try a bold shade that might overwhelm walls or to create a striking focal point using a pattern or an unexpected color combination.
Painting the ceiling is not difficult, but it does require careful preparation. Begin by taping off anything you don’t want to paint and removing any light fixtures or switch plates. Next, use a damp cloth to wipe the surface and prepare it for paint. Next, apply a coat of primer, and when it’s dry, begin with your base coat. If you’re going with a very dark shade, more than one coat may be needed to get the coverage you want.
Once your base coat is in, you can add some more creative elements to your living room. Bold stripes are popular and can be painted horizontally or vertically, depending on your preference. They look great against white or neutral wall colors and can frame a piece of art or highlight a feature wall.
Another option is to use a single wall as a canvas for a mural. This is a fantastic way to add personality to your space without the cost and hassle of undertaking structural work. You can replicate a favorite piece of art or have an artist create a custom design that fits your space perfectly.
A bright green botanical painting will instantly liven up any living room and work well with various decor styles. The bright colors will look fresh, and the organic shapes will give your space a modern feel.
If you’re going for a more traditional look, a deep jewel tone can add a touch of luxury to your living room. This will work best with large windows, as the natural lighting will help the room appear more spacious. For example, designer Cecilia Casagrande chose rich jewel tones such as Farrow & Ball Hague Blue for this historic Boston home. She then layered in modern and traditional furnishings to complement the paint choice perfectly.l
Painting a room is one of the easiest, most cost-effective ways to change your living space dramatically. Whether it’s for touch-ups, a total redecorate, or to create a feature wall idea, it’s a job that any competent DIYer can do in just a few hours.
Paint isn’t limited to walls either – venturing up to skirting boards, architraves, and the ceiling can also make a huge difference to your living space. It’s important to plan and prepare the area by masking and covering any fittings and surfaces you don’t want to be painted. Then, start by sanding the surface to remove any blemishes, wipe down the walls, and sand again before priming (if needed).
Aside from being a practical decorating tool, living room painting can introduce key design elements that give plain rooms extra oomph. You can create a focal point for your space with a striking block of color, add texture using a different finish, or use paint to create faux architectural details like arches and panels.
If you need more clarification about the effect of a particular shade, consider testing it out on small patches on the wall. Look at it in natural, artificial, and incandescent light at different times of the day to see how it will look once it’s applied to your walls.
Living room painting doesn’t need to be bright or bold – pale shades are a great choice for a warm and cozy environment. Darker hues are also becoming increasingly popular for living rooms, especially in the form of dramatic accent walls. Just balance them with lighter furnishings and flooring to keep the space from feeling too dark and brooding.
You can’t go wrong with a blue shade for a calming, restful atmosphere. This shade works beautifully in contemporary and traditional living rooms and can easily be complemented with various furnishing styles. Just be sure to choose a blue that feels warm, as this can be off-putting and make people uneasy.
Best Home Inspection To Do List
A home inspection can be a scary prospect. But with a little preparation, you can be ready to face your home inspector’s checklist with confidence.
It’s important to de-clutter the property before an inspection so that inspectors can get a good look at walls, ceilings and electrical panels. Also, be sure to clear any gates and fences.
Attic
Your attic is more than just an empty space. It can contain structural damage, poor insulation and improper ventilation, all of which have a huge impact on the overall integrity of your home. A good home inspector will thoroughly examine the attic to ensure it is well-ventilated, has sufficient insulation and that no issues are lurking beneath the surface.
As part of the inspection, your home inspector will look at the chimney and make sure it is in good condition and free of cracks or deterioration. A properly functioning chimney not only keeps your home safe but can also help reduce your energy costs.
Since it is a very accessible part of the house, your home inspector will inspect it for moisture and signs of mold. In addition, your home inspector will check the attic ladder and hatch and will take samples of any leaking roof tiles for further testing.
Your home inspector may recommend the installation of insulation in areas that lack it and will examine the attic for the presence of rodents, critters and other infestations. They will also look at the ductwork and ventilation for any issues.
Most of these issues won’t be deal breakers, but if a significant problem is found, you might want to consider changing your offer or renegotiating the price. You could also choose to buy the home with the repairs done, or you could use them as leverage to get the seller to pay for them.
If you’re planning to buy a home, try to attend the inspection so you can ask questions and see the problems for yourself. It will give you a much more thorough understanding of the property than what’s presented on the inspection report.
Basement or Crawl Space
As the name suggests, a crawl space is underneath a home and is generally accessed by entering it from a basement or by removing a floor panel in a garage. This hidden trove of nooks and crannies contains many of a house’s vital systems components including plumbing, electrical wiring, insulation, venting, and more. Home inspectors will examine these spaces and their connections to the rest of a house. Inspectors may also look for signs of foundation issues like cracks and leaks in crawl spaces, basements or foundation walls.
While crawl spaces aren’t always easy to get into, they are a crucial part of a home and should be included in any inspection. If a crawl space is sealed properly with polyethylene vapor barriers, it should be able to prevent moisture from seeping into the home and creating mold problems and other issues. It can also help homeowners save money by keeping their homes warmer in the winter and more energy efficient by preventing cold air from seeping in through the crawl space.
Crawl spaces can be prone to water damage and mold, particularly if the area is not regularly inspected and a dehumidifier isn’t used. In addition, excessive humidity in crawl spaces can cause wood rot and encourage pests, rodents, and raccoons to enter the home, leading to health and safety issues.
There is no set time in a home’s life when a crawl space needs to be inspected, but it should be done at least once every three years to keep the area in good condition. In addition, homeowners who are considering purchasing a new property should have the crawl space inspected before buying, as this will allow them to be aware of any current or potential problems.
Interior Rooms
The inspector will go through every room in the house to examine the condition of everything, from the ceilings to the cabinets under the sink. They will look for things like visible leaks, the amount of water pressure and whether the home has the type of pipes that can be easily rerouted to make changes in the kitchen or bathroom.
They will also check electrical outlets to see how many there are in each room and test them to ensure they work properly. They will also look for proper insulation in walls, attics, basements and crawlspaces which could help reduce heating and cooling costs.
The inspection will take at least two to three hours. It’s a good idea to be present during the inspection so you can ask questions and get a first-hand explanation of the inspector’s findings.
While the results of a home inspection are not definitive, it can be a useful tool to aid you in making your decision about which property to purchase. Problems uncovered by an inspection may be something you can negotiate with the seller to have fixed before moving in, or they might indicate a serious issue that would be better avoided if you looked for another home.
If you’re looking for a thorough home inspection, you can trust Lou Rubino and his team at Inspect This Home to do the job right. A US Army Veteran, Lou is a licensed home inspector who uses his skills to help homeowners protect their investments. He has a thorough knowledge of the construction process and can spot issues that might not be immediately obvious, such as cracks in the foundation or a roof that’s about to collapse.
Kitchen
Every business that prepares and sells food — from restaurant chains to home-based baking businesses — must comply with health laws, which include regular environmental health inspections. And though home kitchens may seem less likely to be inspected, they’re still subject to the same rules. A home kitchen inspection is based on three key areas: how hygienically the food is handled, the quality of food management procedures, and the physical condition of the area.
During the inspection, the inspector will look at appliances like stoves and ovens, dishwashers, refrigerators, and water heaters to make sure they’re in good working order. They’ll also check the floors, walls, and ceilings to see whether they’re a non-flammable material and that they have a smooth, washable finish. They might check the dishwasher for leaks, the refrigerator to make sure it’s below a set temperature, and storage areas to ensure food is kept up off the floor.
If the home has an old propane tank, the inspector might test for flammability or rust, and they’ll note whether it’s been removed from the property. They might also test for the presence of lead and asbestos, but these tests are typically not part of a standard home inspection.
A home inspector is looking for flaws, and they’ll make note of every one that they find — no matter how minor. This means that the report will be long and might list many items that need repair. However, don’t get hung up on the number of issues; an InterNACHI-certified home inspector will know how to prioritize them and help you decide if any are deal breakers for you. If you can, try to attend the inspection yourself; this will give you the opportunity to discuss the findings with the inspector in person and ask any questions.
Roof
The inspector will also look at the roof and the flashing, and check that all shingles are straight and free of cracks, stains and moss. He’ll also examine the gutters, soffits and fascia boards for signs of damage or rot. And he’ll look at the chimney to make sure it is safe and in good condition.
Even if the roofing materials are top-notch, a roof can fail if it’s not installed correctly. That’s why a home inspector is likely to spend a significant amount of time on the roof, often climbing up there. He’ll check the seams, flashing and all fasteners for proper installation. He’ll also look for any leaks, the existence of ice dams and how well the roof is ventilated.
He might use an infrared camera to see any water damage that isn’t easily visible, especially when it’s behind the walls. This can indicate the presence of mold and the need for costly repair or replacement.
If he notices that there is a lot of water damage, he might recommend that you have a professional do an interior inspection to look for more problems. Likewise, he may recommend a reputable chimney specialist for further testing of the chimney and a more in-depth examination.
It’s important that you tag along with your inspector to learn more about the home, and take your own notes and photographs. That way you can ask questions about anything that you’re unclear about. But remember that there are some things that a home inspector just can’t find, such as a hidden leak in the foundation or a dangerous electrical problem. And the home inspector isn’t required by law to tell you about every flaw, even if it might affect your decision to buy the house.
Hello world!
Welcome to WordPress. This is your first post. Edit or delete it, then start writing!