Home » Articles posted by Reid Cohen
Author Archives: Reid Cohen
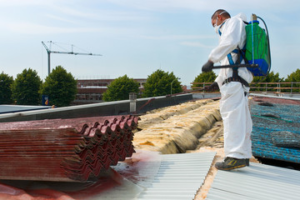
The Dangers of Asbestos Remover
Asbestos is a natural mineral fiber with great heat and fire resistance. Its fiber strength also makes it a popular choice in construction materials, including roofing shingles, paper products, and asbestos cement products.
Professionals will first seal off contaminated areas with polyethylene sheets and duct tape during asbestos removal. They’ll also shut off HVAC systems to prevent dirty air from circulating throughout the building. Click https://www.perthasbestosremovalwa.com.au/ to learn more.
Asbestos was used in a variety of building materials until it was discovered to be an extremely dangerous cause of lung cancer and other serious illnesses. It is still found in many old buildings, and even new construction may contain asbestos. If not properly removed, this toxic mineral can pose health risks for your employees and clients.
A professional asbestos abatement team has the proper equipment and training to safely remove asbestos. They will use a range of tools to break up and remove asbestos material. They will also wet the material to prevent it from spreading dust into the air. They will then place it in a container that is leak-proof and sealed. They will also wear personal safety protection, including protective clothing, masks, and respirators.
The next step is to remove the asbestos waste and transport it to a certified landfill. The professionals will follow strict storage and disposal guidelines to ensure that the material doesn’t spread or contaminate other parts of your building. In addition, they will seal off the work area with plastic sheeting and negative air pressure units. They will also post warning signs to alert others that an asbestos removal project is underway.
Asbestos waste can be processed in a variety of ways, but the most established method involves heating the material to break it down into nonhazardous inert minerals. These minerals can then be recycled into ceramic and stoneware products and as aggregate for roadways and concrete.
If asbestos is disturbed, it can release tiny fibers into the air. These can be inhaled and lodged in the lungs, causing mesothelioma, lung cancer and other diseases. It is therefore important to use safety measures during any building repairs, renovations or demolitions that may disturb asbestos-containing materials. These include proper handling, minimizing the spread of dust particles, and establishing a decontamination area for employees.
Workers should wear respirators and other protective equipment while working with asbestos. These should be cleaned, disinfected, and inspected on a regular basis. They should also be disposed of immediately after use. It is also advisable to use disposable gloves and wash hands after work. Workers should also be sure to seal off the work area from other parts of the house and turn off heating and cooling systems. This will minimize the risk of spreading asbestos throughout the home and exposing other family members.
It is also advisable to keep pets and children out of the work area. They can easily track in asbestos particles and may bring them back into the home. It is also important to have the work area covered with plastic sheeting and duct tape and to block off access to it.
The risk of exposure to asbestos can be reduced by using wet methods. These include spraying the material with water or sanding it. The use of power tools with special local ventilation attachments can also reduce the exposure to airborne particles. However, some maintenance activities still pose a risk of exposure, such as sanding or drilling friable ACM.
These types of repairs should be done by professionals who have been trained in asbestos handling. Other maintenance activities that are not considered to be major repairs should be avoided, such as repairing or painting old asbestos insulation, sanding vinyl floor tiles or cutting, tearing or sanding the backing of ACM.
In addition, it is important to take precautions when sampling for asbestos. It is best to wet the sampled material with a fine mist of water containing a few drops of detergent before taking the sample. This will help to reduce the release of fibers during the sampling process.
Asbestos is a naturally occurring mineral that has been used in thousands of products. It is very strong and heat resistant, making it a useful material in a wide range of industrial and commercial products. However, it is also known to cause several health problems including mesothelioma and lung cancer. Asbestos environmental pollution is a serious issue, and it can be caused by a variety of different activities. These include buildings that contain asbestos, renovations and demolition work, and mining activities. These activities can release airborne asbestos fibres, which are then carried by wind and moved around the globe by global weather systems.
The most common source of asbestos contamination is from the application, disturbance and removal of asbestos-containing materials (ACM). ACM can be found in various building products such as floor tiles, roof shingles, exterior siding, cement, laboratory equipment, and automotive brakes. When ACM becomes damaged, microscopic asbestos fibres may become airborne and inhaled by individuals entering the area. Asbestos fibres can also be released from surfacing ACM, which is sprayed, troweled-on or otherwise applied to surfaces for acoustical, fireproofing or other purposes, and thermal system insulation ACM, which is rolled, spray foamed, sprayed-on or otherwise applied to pipes, boilers, ducts, tanks, and other structural components to prevent heat loss or gain.
Once asbestos is airborne, it can be easily inhaled into the lungs and cause serious health problems. If it is inhaled on a regular basis, it can lead to lung diseases such as mesothelioma and asbestosis. These diseases can be fatal if not diagnosed and treated in time.
During an asbestos abatement project, professionals will take many steps to minimize the risk of exposure. They will start by shutting off the HVAC system and blocking off any areas that don’t need work with tarps and heavy-duty adhesives. They will then put a filtration unit in place to create a negative pressure environment in the contained work zone. This will ensure that any air that enters the filtration unit is not recirculated into the non-abatement area.
When the workers are finished, they will carefully decontaminate themselves before leaving the work zone. They will wear disposable suits, hoods, gloves and shoe covers. They will also have a clean-up/decontamination station that is separate from the work zone. Finally, they will perform a final inspection to make sure that the work area is safe and that no asbestos has leaked outside the containment area.
The cost of asbestos remoer varies depending on the type and size of material being removed. The more friable the asbestos, the more expensive it will be to remove. However, even non-friable asbestos poses a risk and should be handled by professionals. The EPA recommends having all asbestos materials removed before attempting any renovation work in order to prevent future health risks.
The first step in removing asbestos is to prep the area. This involves removing personal items, toys, and tools from the area where the asbestos removal will take place. It also requires that the contaminated area be sealed off to keep it from spreading. A two-person crew can expect to spend up to eight hours on pre-clean and set-up.
Once the prep is complete, the actual abatement process begins. The workers wear protective suits and respirators to avoid inhaling any of the asbestos particles. They may also wear a plastic face mask to protect their skin. They will wet the asbestos-containing material before tearing it away. This is a crucial step because it helps to contain the toxic particles. The contaminated debris is placed into durable, airtight waste bags and containers for disposal. This material is then transported to a landfill that is equipped to handle asbestos.
Some of the most common areas for asbestos to be found are in ceiling tiles, vinyl floor coverings, insulation, and ductwork. Inhaling these substances can lead to a variety of illnesses including mesothelioma, lung cancer, and other serious diseases. Asbestos is a combination of six minerals that offer fire resistance and heat insulation, which made it very popular for building materials.
The most common types of asbestos found in homes are chrysotile and crocidolite. Chrysotile, which is white asbestos, is most often used in walls, ducts, and ceilings. It has very thin fibers and is more easily inhaled into the lungs. Crocidolite, which is blue asbestos, is more commonly found in cement products and pipe insulation. Its thinner fibers cause a more severe reaction and is more costly to remove than chrysotile asbestos.
Ceiling Repair – How to Keep Your Ceilings in Good Condition
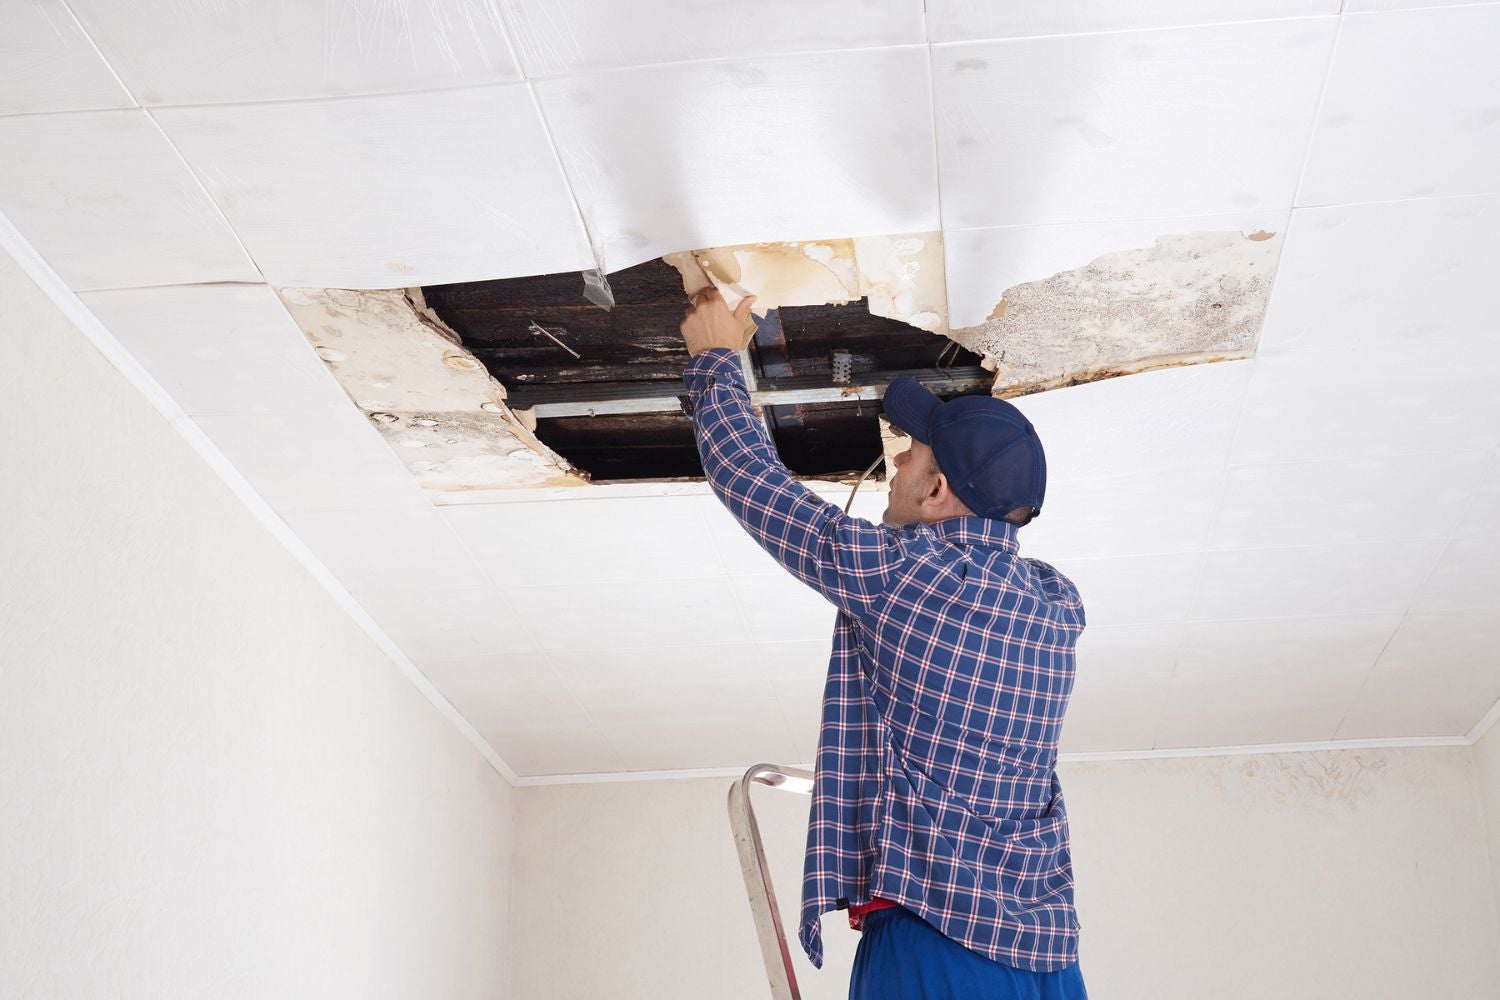
Keeping your ceilings in good condition will protect your home’s drywall and add value. Damaged and sagging ceilings can be costly, and water stains and mildew can cause health issues in some individuals. Plumbing leaks usually cause holes in the ceiling that must be fixed immediately before more extensive damage occurs. It’s also important to find the source of the leak and repair it properly. Check out this website at https://perthinsulationremover.com.au/ to learn more.
Drywall Repair
Drywall repair is the process of filling holes, cracks, or other imperfections in drywall. Small scratches and dents can be filled with a layer of spackle or drywall compound and then smoothed over, but larger holes require a patch kit and a new piece of drywall to repair. Larger holes may also need reinforcing mesh before spackling, but even that is often unnecessary, depending on the size and extent of the damage.
Dry wall is attached to wood studs, and changes in temperature or humidity can cause those studs to bend and create cracks in the drywall. Whether these cracks are small or large, it is important to repair them, as they can allow water to get in and cause further problems. A professional painter can easily repair these cracks and gaps, but you can also do it yourself if you follow these tips:
First, make sure that the area surrounding the hole is free of loose drywall and debris. Use a putty knife that’s 3- to 4- inches wide, instead of the narrow utility knives you might normally use for wood putty, to spread and smooth the drywall compound or spackle. Make sure to apply several thin layers, letting each one dry before applying the next. This will ensure a smooth, even repair. Finally, lightly sand the surface to smooth it and remove any bumps or ridges.
You can also use a patch kit for smaller holes. When using a patch, be sure that it’s the right size for the hole; if it is too big, it will cause additional damage when you try to screw it in place. Then, follow the instructions on the package to install the patch. It will typically include a piece of masonite or plywood to hold the patch in place, which is secured with strips of paper drywall tape.
If you have drywall anchors (like nails or screws) that are coming loose, you can usually fix them by cutting away the old piece of drywall and then nailing in a replacement. If you have major water damage, however, your contractor will need to take down the entire ceiling and may need to replace insulation as well.
Water Damage Repair
Water damage repair is a huge job that can cost thousands of dollars. First, there’s the cost of removing and replacing water-logged walls and ceilings. Then there’s the cost of dehumidification, repairing/replacing insulation and drywall, and other general repairs. The amount of water that needs to be removed and the extent of water damage determines the overall cost of water damage repair. If there’s a lot of standing water, it’s important to drain and pump out the water as quickly as possible to avoid serious structural damage and prevent mold growth. It’s also important to be safety conscious and turn off any electricity in the affected area, says Thumbtack home expert David Steckel.
Water damage can be caused by a wide range of things, from natural disasters and heavy rain to plumbing issues like leaks and burst pipes. It can cause everything from imperceptible staining to severe structural damage and potential health risks. When water damage occurs, it’s important to find out the source of the water so that the proper repairs can be made. It’s also important to remove all of the affected materials, including drywall down to the studs, carpeting and padding, and other flooring. This helps to speed up the drying process and ensures that the structure is completely dry before it’s closed up again.
Hole Repair
A hole in the wall is unsightly and can serve as a point of entry for pests and other undesirables. It can also cause damage to the drywall or plaster, which requires extensive work to repair. However, with a little effort and care, it’s possible to patch a hole and make it virtually undetectable.
The first step is to clean the area around the hole. This removes any dust and debris that could interfere with the repair process. It’s also a good opportunity to clean any loose drywall or plaster that may have come from the hole itself.
Next, if the hole is small enough it can be repaired with spackling paste and a putty knife. This will take less time and is a good choice for those who want to quickly repair a small hole, then paint over it as soon as possible.
Larger holes require a more involved method. It’s best to use a drywall patch that is slightly larger than the hole. This will allow you to “feather” the joint compound into the rest of the wall when applying it. This will make it easier to hide the patch, as well as give a more professional looking finish.
To prepare the hole for the patch, it’s necessary to cut a neat square or rectangle out of the remaining drywall around the hole. Then, using a level and a stud finder, locate the studs on either side of the hole and mark a line up above it straddling both studs. It’s important to do this to ensure the new drywall patch will be secured properly to the studs.
Once the patch is in place it’s time to apply joint compound. Be sure to use a good quality joint compound that is designed for drywall. It should be applied liberally and smoothed with a putty knife. Be sure to feather the compound into the rest of the wall when sanding.
This will help to ensure that the textured surface of the wall blends in with the smooth surface of the patch. It’s also a good idea to use a piece of drywall tape over the seams to further strengthen the repair.
Peeling Paint Repair
Paint peeling isn’t just unsightly; it can also lead to further problems, including water damage and mold. If you notice a section of your wall or ceiling that’s flaking, you need to fix it before you repaint the area. This might be as simple as scraping away loose or damaged paint and patching up any holes left behind by the peeled area. As with other drywall or plaster repair work, you’ll want to put on your goggles and dust mask before beginning this task. Paint and sandpaper don’t mix well!
First, use a wire brush or paint scraper ($13, The Home Depot) to remove any loose or chipping paint. You may need to apply a bit of pressure, but don’t overdo it; you don’t want to damage the surface underneath. Once the paint has been removed, patch any holes left behind and smooth the area with a putty knife. Professional painter Matthew Stone recommends using a spackling compound like DAP Drydex, as it’s designed to hold up well to moisture and won’t crack.
After sanding, wipe the space down with a damp sponge or tack cloth to ensure a clean wall surface and prevent it from becoming stained by any remaining mold, mildew or other contaminants. Once the area is completely clean and sanded down, you can apply a thin coat of primer. Then, let it dry according to the manufacturer’s instructions.
When the primer is dry, you’re ready to start painting! Once again, be sure to wear your dust mask and goggles so you don’t get any tiny flecks of paint in your eyes or on your skin. If you’re unsure of the proper way to finish painting your ceiling, contact a reputable local painter for assistance.
The main goal of this blog post is to show how easy it can be for homeowners to fix common issues that come up while they’re doing DIY projects in their homes. If you ever have any questions or concerns, please don’t hesitate to contact us. Our team at Tribble would love to help!